Continuing my thoughts from my last post, by now you’ve probably noticed that, while I’ve gone on and on about the joys of viewing films, I haven’t talked much about editing. After all that’s what the Kalart was designed to do, physically cut a strip of film into two pieces, put another section in between, glue the ends together and voila, you have a whole new movie!
Exciting, yes! Practical to demonstrate sixty years later, no. First off the bottle of glue I found in the box had to be at least as old as the rest of the equipment. Second, I edit news video for a living and since I love old tech so much, it really pains me to admit the truth. Computerized non-linear editing software beats the sprockets off old film or tape systems any day.
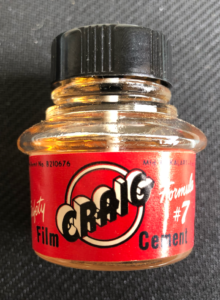
Craig Formula 7 Film Cement
I won’t give you a crash course on computer editing, there are multiple schools and online videos that can provide you with such knowledge. I’ll just show you a few examples of the way it used to be done and share some editing lingo that still exists.
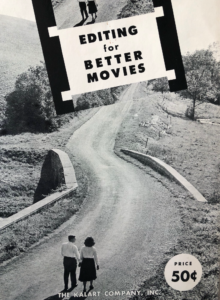
First off, let’s look at the past. I love the edit tips my dad got in this booklet. Kalart offered a heck of a deal, “Editing for Better Movies,” a fifty cent value, for only ten cents. This wonder arrived on our doorstep on September 13th, 1963. I know the date because he kept the envelope with the postmark. There are tons of editing suggestions packed into the booklet, but I’ll just share a couple that stood out to me.
Editing for Better Movies Booklet
One is the actual process of editing itself. Apparently you were supposed to physically cut the film, then scrape off a swath of emulsion on the end without gouging all the way through the film base.
The next step was to use a tiny brush to evenly cover the exposed area with Craig Film Cement (aka glue), then use the pressure plate to hold the two ends together until the cement sets. Only then did you have a new movie. Simple, huh?
Not!
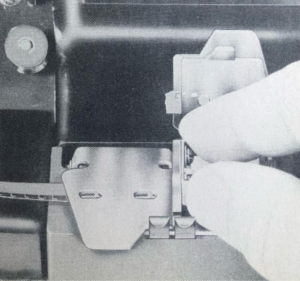
“Easy” Film Splicing
There is one legacy from the aforementioned process that is still with us today. Notice they physically cut the pieces of film to rearrange then into a new order? Well, today one definition of the word “Cut” means to edit. I still cut video every work day, I just don’t use an actual razor blade. Although, some editing systems have a razor blade icon in their software which appears when you make a “cut.” Cute.
That’s not the only edit lingo holdover. When cutting a news video you have to show images which match the subject of the story, say for example, a city bus. Viewers will see pictures or video of the bus while an anchor or reporter talks about it. This cover video has an unusual nick-name in the business. B-roll.
What-Roll you ask?
Well in the early days of TV news all stories were shot on film and brought back to the station for processing. News film edit systems were pretty primitive back then, not much more advanced than my Kalart really, except the film had a sound track, which posed its own problems. They had no way to get the pictures of the bus over the voice track of the reporter, so news stations came up with a difficult, yet ingenious answer.
They cut all the sound film, interviews where you saw as well as heard a person speaking, and the reporter’s voice all together on one long reel. They called this reel the A-roll. Then they would cut the pictures they wanted people to see while the reporter talked, film of our bus for example, on another reel, along with filler frames at various intervals, timed to match the A-roll. They called this the B-Roll. At the beginning of the show they would, pray to the news gods and roll each reel simultaneously. Then the control room would switch to the A-roll whenever you were supposed to see someone speak, then to the B-roll to see the bus pictures. The director would cut back and forth between the A and B-rolls during the entire newscast and, hopefully, the viewer would see the complete story without a clue as to how it was done.
I have no idea how well this worked in practice. I didn’t come into the news biz until editing on video tape was the norm. The actual film reels were long gone, but the term B-Roll lingers to this day.
One more film phrase that’s still with us, “in the can.” Back in the day film came in metal cans and the photographer put his exposed film back in the can when he was done shooting. So, in the can still means the footage has been shot, even if that footage is now stored on a memory card instead of a strip of celluloid.
One last thing I’d like to mention. Today’s editing suites come with dozens of effects that can make anyone’s home movie look like a major motion picture production. All you have to do is choose one and drag and drop.
In days past it wasn’t so easy. Remember the “Editing for Better Movies” pamphlet my dad got? It was possible to do a limited amount of special effects even back then, if you had some scotch tape and were willing to shell out 85 cents for a bottle of something called Craig Fotofade.
Craig Fotofade Directions
The idea was to put a piece of scotch tape diagonally near the end of a strip of film. This tape would protect the emulsion from fading away when you dipped the tip into the bottle of Craig Fotofade. The unprotected part of the movie would vanish, leaving you with a clear piece of plastic. You repeated the process on the end of another strip film, being sure to put the scotch tape in the opposite direction. Then you spliced the two pieces together and you had a not-so-instant dissolve. Difficult, but apparently doable, if you practiced hard enough.
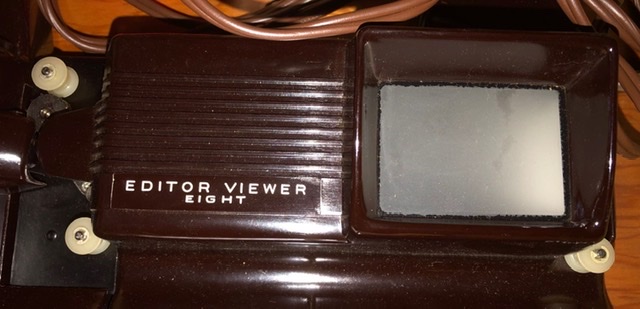
Fortunately I don’t think I can lay my hands on an intact jar of Craig Fotofade after 56 years, so I will settle for hand cranking my Castle Films through my Kalart Editor-Viewer 8.
